
Before we Start#
Let’s quickly address the question: “Why does it matter?”
Simple said: “You can literally do anything in Gazebo if you know how to develop plugins”.
Want to simulate the Martian Environment for developing your mars rover? Easy, develop plugins that can generate terrain based on real elevation data, simulate day/light conditions and dust storms that also affect the sensors: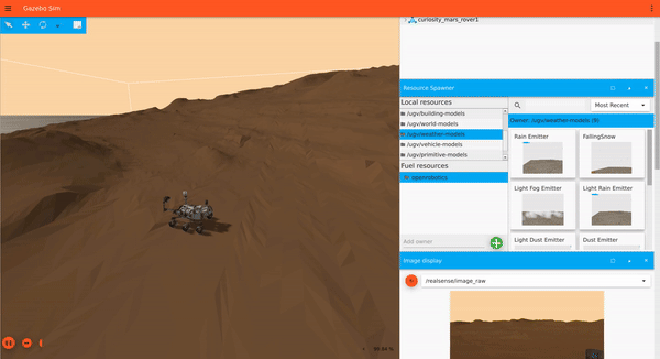
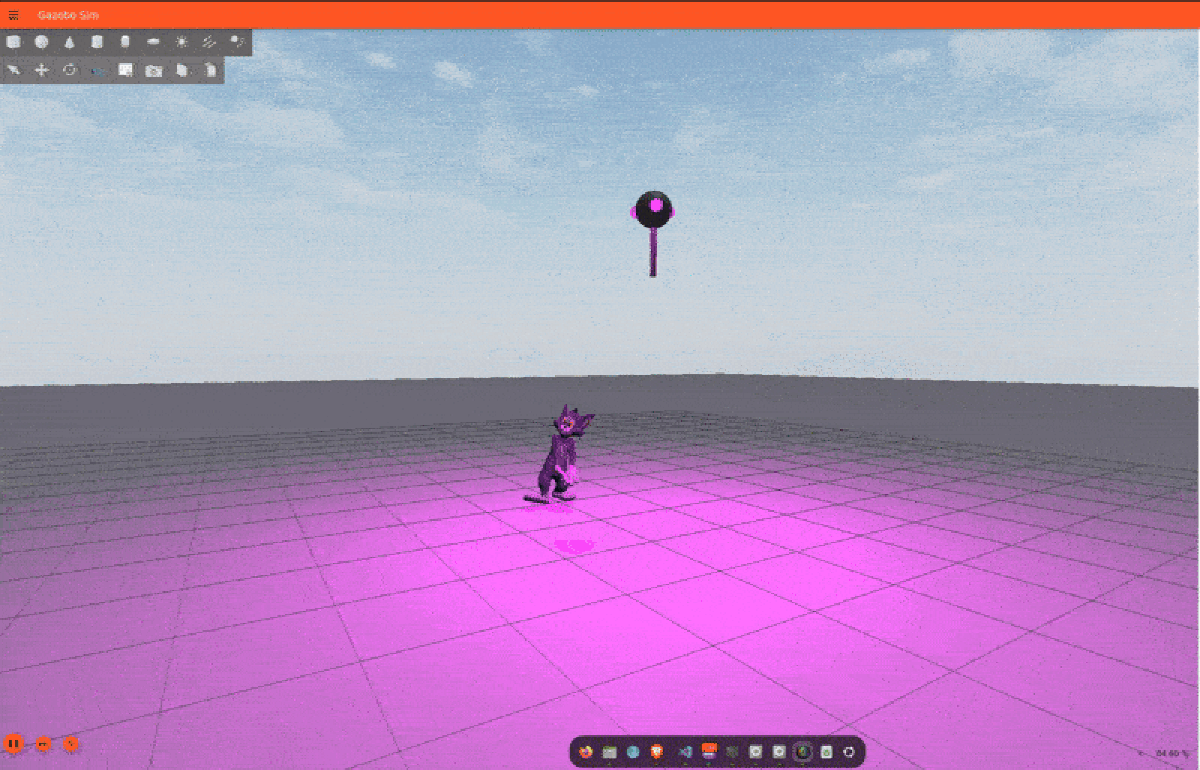
Want to make Tom Cat Dance in Disco Party? Develop an LED plugin and simulate a disco light with it:
Want your robots to simulate LEDs/Indicators like real ones in Gazebo? Well, you guessed it, develop a plugin for it: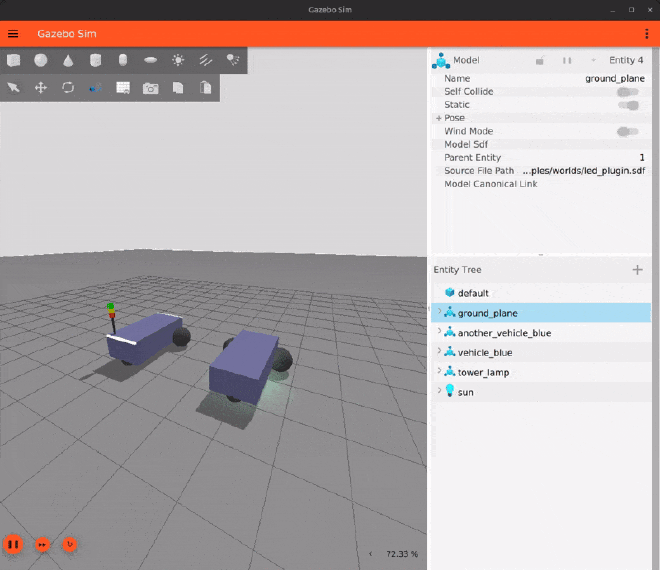
So clearly, Gazebo’s System Plugins are important. Therefore, this blog series aims to provide a “Beginner’s guide to making System Plugins for Gazebo” - from introductions to development details with handy insight here and there.
Throughout this series, I’ll be taking references from my latest plugin, gz_sim_led_plugin, for explaining implementation details.
Let’s start!
A (Very) Brief Introduction to Gazebo#
First things first, What is Gazebo?#
Well, its a Robotics Simulator, duh.
But that is a user’s perspective. What about from a developer’s perspective? From a developer’s perspective, Gazebo is a collection of numerous C++ libraries (16 to be precise) that work together to make every thing possible from physics to rendering to GUI, CLI, SDFormat parsing, etc.
Libraries such as gz-physics, gz-rendering act as an abstraction that allows Gazebo to work with any physics and rendering engines you want. Libraries such as gz-sim and gz-gui act as the backend and frontend respectively, while gz-transport and gz-msgs enables the communication between different sub systems of Gazebo using topics and services (much like ROS / ROS 2). I can go on but I hope you get the idea.
Gazebo’s Architecture, Terminologies and Plugins#
Gazebo already has detailed official docs on its architecture and terminologies. For keeping things short here, I’d suggest you read the linked docs with some extra emphasis on Gazebo’s client-server & plugin-based architecture, Entities, Components, Entity Component Manager (ECM), and Simulation Loop.
Gazebo’s System Plugins & Plugin Interfaces#
A plugin, by definition, is a piece of software which can be “plugged in” to an existing software for modifying its runtime behavior.
Gazebo offers a plugin-based architecture where we can load such System Plugins dynamically in association with any Entity in our simulation world. You can find a list of all the system plugins that come with Gazebo by default here.
Loading & Execution#
Whenever Gazebo parses an SDF world, it looks for the:
<plugin filename="libMyPlugin.so" name="MyPluginClass">
...
</plugin>
From this snippet, the filename attribute provides the name of the plugin’s shared library and the name attribute provides the name with which the plugin’s class was registered in the source code. These details help Gazebo to load the plugin as an instance at runtime and call its functions to execute the extra functionality it adds.
But…since a plugin is basically an external piece of software, how does Gazebo know which functions of the plugin instance to call and when?
This is where the Plugin Interfaces come in. A plugin interface, like the name implies, acts as a fixed bridge between Gazebo and the plugins. They allow Gazebo to execute the plugin’s functionality without caring about how they have been implemented. These interfaces are basically abstract classes and virtual functions that the plugin can implement. After loading, Gazebo calls these different interface functions for each of the loaded plugins at different points of time in the simulation loop.
All of this loading happens in the SystemLoader class of gz-sim with the help of gz-plugin library (yet another library in Gazebo’s aresenal). On the other hand, the execution of the different interfaces of the loaded plugins is handled by the SystemManager and the SimulationRunner classes in gz-sim.
Below is a list of the different interfaces that are available for System Plugins to implement:
ISystemConfigure#
This interface is executed once when the plugin is loaded by Gazebo. This is where we get our parsed SDF description as a sdf::ElementConstPtr instance which we can use to configure our plugin with any user provided settings. In addition to that, this interface also receives a pointer to the gz::sim::EntityComponentManager which can be used to read/write any kind of data from any kind of entity you want.
For instance, the DiffDrive system plugin uses the ISystemConfigure to read the user settings like <wheel_separation>, <wheel_radius>, <max_linear_velocity>, etc. and configure the class internally by using these values for their respective members.
ISystemPreUpdate#
This interface is executed periodically right before physics runs in every step of the simulation loop. Use this to apply any changes or modifications (apply force, velocity, controls, etc.) to any entities in the world. You can then see the effects of that change during the simulation step. This interface receieves a gz::sim::UpdateInfo instance which you you can use to access information like simTime. Similar to the ISystemConfigure, you also get the gz::sim::EntityComponentManager here with read/write access.
For instance, the ApplyJointForce system plugin uses the ISystemPreUpdate interface to apply a force to the joint entity with the name <joint_name> using the JointForceCmd component.
Similarly, the DiffDrive plugin uses the ISystemPreUpdate to apply velocity commands to the required joints using the JointVelocityCmd component.
ISystemPostUpdate#
This interface is also executed periodically right at the end of each simulation step. It carries the same signature as ISystemPreUpdate with one difference - it is read-only, i.e, you cannot write any changes to entities in this function. Use this to see the results of any actions that occured during the simulation step like state changes (pose, velocity, etc.), sensor readings, etc.
For instance, the JointStatePublisher system plugin uses the ISystemPostUpdate interface to read the joint states and publish them on a topic at the end of every simulation step after the physics has already acted.
Similarly, the DiffDrive plugin uses the ISystemPostUpdate to read the joint position and velocities for updating and publishing the odometry.
Apart from these 3 interfaces, there are also ISystemUpdate and ISystemReset interfaces that are pretty self explanatory. You can read more about them here.
Some other kinds of Plugins in Gazebo’s Ecosystem#
Physics Plugins#
Gazebo’s plugin-based architecture provides it with the fexibility of being used with any physics engine. For that, you just need to implement the required interfaces from the gz-physics library. This implementation will connect your physics engine with Gazebo and is known as the Physics Plugin. You can read more about it here. By default, Gazebo comes with a bunch Physics Plugins for common physics engines like: DART and Bullet.
Rendering Engine Plugins#
Similar to the Physics Plugin, Gazebo also allows you to integrate any Rendering Engine of your choice with the help of Rendering Engine Plugins and the gz-rendering library. You can read more about it here. By default, Gazebo comes with rendering engine plu gins for OGRE, OGRE2 and Optix (a very old version of Optix).
GUI Plugins#
These plugins are loaded on the client side and extend Gazebo’s GUI. You can add custom panels, widgets, or visualization tools to help interact with your simulation. Anything you see on Gazebo’s default right side panel is a GUI Plugin. These GUI plugins are made with the help of the gz-gui library which builds on top of Qt. You can read more about it from here.
Rendering Plugins#
You should use these when you want to change the visual appearance of your rendering scene. Here, it advised to use an EventManager instance to connect to the PreRender, Render or PostRender events as they are emitted directly from the global render thread and aare safer to use. However, do keep in mind, Gazebo has 2 scenes being rendered by default: one on client-side and other on server-side. Loading your Rendering Plugin as a System Plugin, would only affect the server’s scene (affecting sensors) and loading it as a GUI plugin would only affect the UI-side scene. Luckily, we have the SceneBroadcaster System Plugin which broadcasts all the server scene changes to the GUI scene. You can read more about Rendering Plugins here.
Visual System Plugins#
As another alternative to the SceneBroadcaster setup explained above, you can also go with the Visual System Plugins. These are special kinds of System Plugins that are loaded from within the <visual> element of a model’s SDF. By default, they are loaded on both the server and client sides, making them ideal for plugins that need to update visuals of entities. But don’t forget to use the rendering events (explained above) to make any rendering changes to the scene. The ShaderParam plugin is an example of such Visual System Plugins.
And, that’s a wrap on Part 1 🎉. I hope you learned something new. Do checkout the next part!